

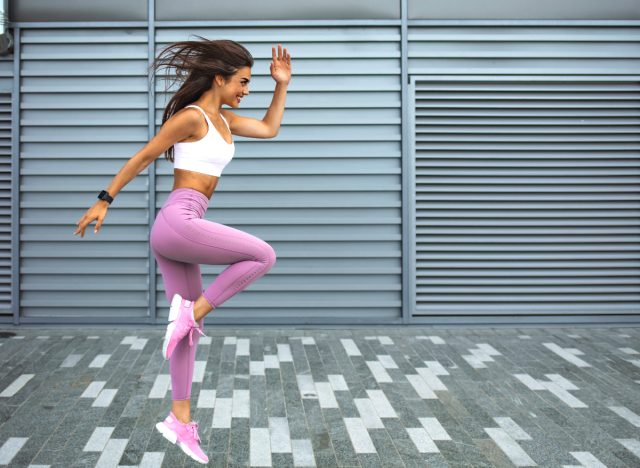
The 30-Day Standing Workout for Ripped Abs in Record Time – If you’re looking to sculpt ripped abs in record time, you can do so in 30 days or less. All you need are the right standing exercises in your arsenal to carve out a leaner, more toned tummy. The best part is that you can perform standing exercises essentially anywhere you happen to be and don’t need any extra equipment (other than dumbbells in some cases). Eat This, Not That! spoke with Ronny Garcia, CPT, Blink Fitness, who breaks down the ultimate 30-day standing workout for ripped abs in record time, so listen up!
Table of Contents
The 30-Day Standing Workout for Ripped Abs in Record Time
In order to sculpt a chiseled midsection, keep in mind that you need to focus on total-body fat loss, consistency, and solid nutrition. You can’t spot reduce or tone just one area of your body; you will lose fat and tone muscle all over your body. “Standing exercises are essential for functional strength because they not only work your ab muscles, but also your stabilizer muscles,” Garcia tells us. “They often involve multiple muscle groups (ex. legs and glutes) which leads to a more complete workout.”
To begin, Garcia recommends working out three to four times a week and performing two to three sets of 12 to 15 reps of each exercise. Keep reading to learn all about his top-recommended 30-day standing workout for ripped abs. And when you’re done, don’t miss The 8 Best Exercises To Melt Belly Fat.
Day 1—10:
1. High Knees
To start off with high knees, assume a hip-width stance, and stand tall. Swiftly ring one knee up to your chest before lowering it back down and repeating with the opposite leg. Alternate lifting your knees as if you’re running in place.
2. Oblique Twists
Begin this next exercise by planting your feet just outside shoulder-width on the floor. Bend your knees just a bit. Your head and hips should remain facing forward as much as you can during the exercise. Lengthen your arms out to your sides. Twist your torso to the left and then to the right, squeezing your shoulder blades as you do so.
3. Standing Bicycle Crunches
For standing bicycle crunches, plant your feet hip-distance apart, and stand tall. Place your hands at the back of your head. Then, lift your right knee, and rotate your torso in order to touch your left elbow to your right knee. Head back to the start position, and perform the same motion on the other side.
4. Standing Side Leg Raises
Start standing side leg raises by placing your feet shoulder-width apart. Bend your knees just a bit, and activate your core muscles. Raise your left leg out to the side as high as you’re able to while keeping your right leg stable. Repeat on the other side.
Day 11—20
1. Standing Mountain Climbers
Standing mountain climbers are essentially high knees while raising the opposite arm overhead. So as you lift your left knee up to your waist, raise your right arm overhead. Then, as you lift your right knee, raise your left arm overhead in a swift motion. Continue to alternate.
2. Wood Choppers
For wood chops, plant your feet shoulder-distance apart, and hold onto the ends of a dumbbell. Twist at the hips as you bring the dumbbell up to your left side. Then, engage your core as you twist to the right and bring the dumbbell down and across your body to your right side. Essentially, you’re bringing the weight from the front of your body to the back of your body. Repeat on the opposite side.
3. Standing Russian Twists
The standing Russian twist is an excellent rotational movement that will fire up your obliques. Start by planting your feet shoulder-distance apart and holding a medicine ball out in front of you. Your arms should be parallel to the ground. Twist your torso to the left, and pivot your right foot. Then, rotate to the right, and pivot your left foot. Continue to twist.
Day 21—30
1. Standing Cross Crunches
For the standing cross crunch, begin by planting your feet shoulder-width apart and placing your hands at the back of your head. Then, lift your right knee as you bring your left elbow to meet it and crunch your body. Lower your leg, and quickly lift your left knee as you bring your right elbow to meet it. Continue to alternate.
2. Standing Leg Circles
Start leg circles by standing tall, lifting your left leg, and keeping your toes pointed forward. You can hold onto a chair on your right side for extra support. Place your left hand on your hip. Make small circles with your raised leg. Then, repeat on the opposite side.
3. Knee Raises
Stand tall, and plant your feet shoulder-width apart. Extend your arms out to your sides. Contract your abs as you lift your right knee as high as you’re able to, and extend your left arm ahead of your body. Return to the start position. Then, lift your left knee, and extend your right arm ahead of you. Continue to alternate sides, and squeeze your core.
![]()